Version: Next
Thymeleaf模板引擎
引入Thymeleaf
<dependency>
<groupId>org.springframework.boot</groupId>
<artifactId>spring-boot-starter-thymeleaf</artifactId>
<version>2.2.6.RELEASE</version>
</dependency>
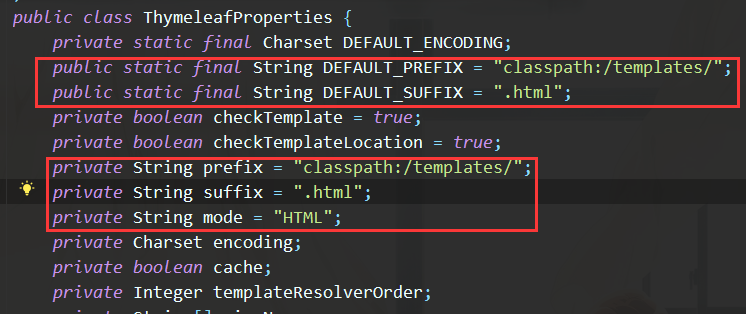
如何使用Thymeleaf?查看Thymeleaf自动装配类ThymeleafProperties

可以看到默认的前后缀设置,因此,只需将html页面放在类路径templates文件夹下,thymeleaf就可以帮我们自动渲染了
- 测试
TestController
@Controllerpublic class TestController {@RequestMapping("/t1")public String test1() {//classpath:/templates/test.htmlreturn "test";}}classpath:/templates/test.html
<!DOCTYPE html><html lang="en"><head><meta charset="UTF-8"><title>测试</title></head><body>Thymeleaf模板引擎</body></html>启动项目,发现根据先前查看的前后缀,SpringBoot成功使用Thymeleaf输出了这个我们的页面
Thymeleaf语法
(推荐使用freemarker或者去学Vue)